[ad_1]
This submit could comprise affiliate hyperlinks. As an Amazon Affiliate, I earn from qualifying purchases. Please learn my disclosure.

Nothing lasts perpetually and that actually applies to wax basis. Stopping the buildup of outdated wax in your colonies is an effective option to promote wholesome bees. The time will seemingly come when it is advisable to study the right way to set up beeswax basis in wood frames. Whereas it might appear a bit overwhelming at first, it’s actually not that troublesome. It’s also good for beekeepers to know the right way to assemble and restore a few of their very own hive parts.

Each beekeeper should discover ways to transfer and manipulate frames. That is what units fashionable beekeeping aside from conventional practices. Frames and basis are among the important beekeeping provides that you’ll work with all through your years of managing hives.
Including New Basis to Your Bee Frames
The precise elements included will rely considerably on the kind of beehive that you simply select to make use of in your apiary. Frames might be product of plastic or wooden and are available numerous sizes to suit the completely different heights of the hive containers.
These frames are designed to carry the sheets of honeycomb to be constructed by the bees. Removeable frames make it attainable to take away comb for hive inspections – with out destroying it.
It’s commonest for beekeepers to make use of a chunk of basis inside frames. This encourages bees to construct straight comb contained in the wood construction.
Often, the sheets of wax basis comprise small wires for assist. In years previous, beekeepers needed to “wire their frames” – right this moment wire already embedded is the norm.
In recent times, the usage of plastic basis has change into extra fashionable. It’s out there in a number of colours together with: black, white and yellow.
Beekeepers can argue all day over which sort of basis is finest, which shade is finest and even if you happen to ought to use any basis in any respect.
I’ll depart that argument to them – I personally choose common beeswax basis. That’s what this submit is about. However, that doesn’t imply you can not achieve success with different strategies.

Why Basis Ought to Be Changed
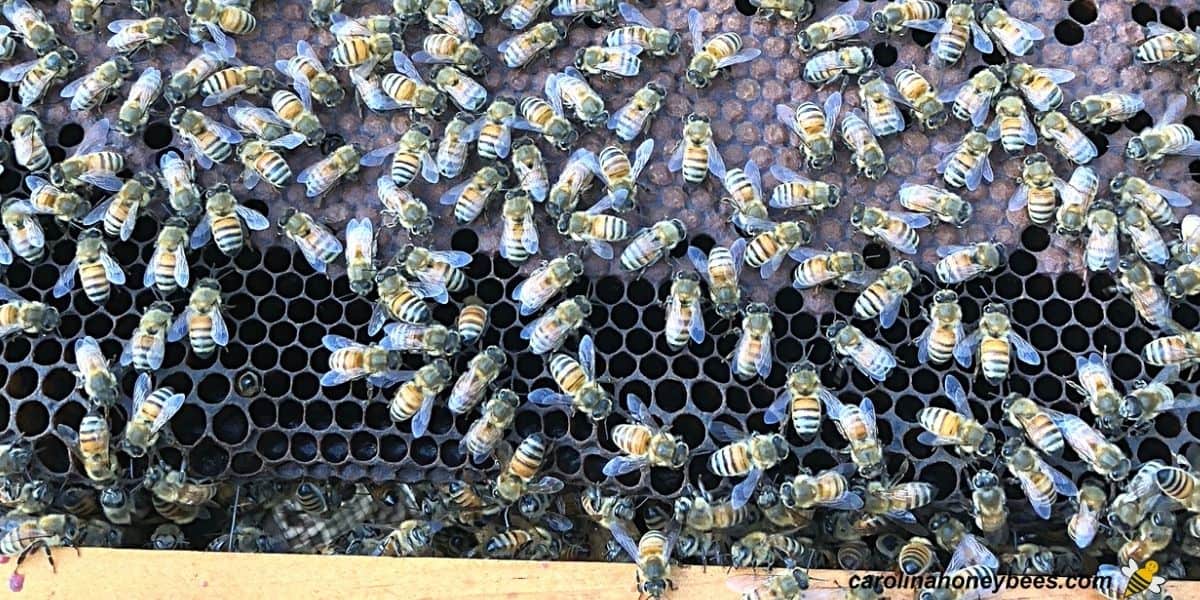
Beeswax is a made by the wax glands of employee bees, and used to construct comb. Contained in the hive, sheets of wax comprise 1000’s of particular person cells. They’re utilized by the colony for meals storage and brood rearing.
This wax is an absorbent construction. It absorbs many substances contained in the hive. Bee propolis, honey and pollen saved in honeycomb cells causes staining of the wax.
Contemporary beeswax will probably be white but it surely turns into darker shortly. After a number of years, the wax honeycomb could change into virtually black. Some chemical compounds introduced into the hive from the surface world will probably be absorbed within the wax too. This isn’t factor.
Even we beekeepers contribute to the contamination by means of numerous merchandise for varroa mite management. For these causes, it’s good beehive administration to substitute the beeswax comb periodically.
Specialists disagree on optimum comb alternative schedule however each 5 years is an effective rule of thumb. When you use wax basis, this implies putting in new beeswax basis in your frames.
For these utilizing plastic basis, it is advisable to scrape the outdated wax off the plastic sheets and permit the bees to construct new comb. It’s faster than coping with sheet set up – however a nasty job.
Many beekeepers take pleasure in assembling their very own frames for his or her hives, this helps guarantee job is completed! Whereas doing basis alternative, it is a good time to ensure the joints of your bee frames are good and tight.
New Basis in Brood Frames
Previous brood frames can maintain some actually gross wanting honeycomb. Typically, beeswax will change into darker annually that it’s utilized by the bee colony. That is very true within the space the place younger are being raised.
And, as generations of brood (child honey bees) emerge, they depart behind pupal cocoons. These cocoons cut back the scale of the honeycomb cells as time goes by. This makes for a really unhealthy atmosphere for creating bees.

Maybe some pests, equivalent to wax moths, have broken elements of the comb. Do you see any webbing? It is a signal of wax moth infestation.
Small Hive Beetles are additionally drawn to outdated brood combs which have contained pollen. The colony will restore minor holes and tears however they will’t take away contamination.
Actually, the worst difficulty with outdated comb is the tendency to soak up chemical compounds from the atmosphere and hive administration. Let’s get that gnarly comb out of there and reuse the wood frames.

Changing Previous Wax Basis with New
1. Take away wood “wedge” from the highest bar. It matches underneath the highest bar and is held in place with small nails or staples.
Don’t throw it away and check out to not break it – however if you happen to do – don’t panic. You possibly can nonetheless reuse the elements of the wedge when putting in your new beeswax basis.
In fact in case your frames are new – you gained’t have a wedge nailed in place. Nonetheless, you may even see it loosely connected to the body. If that’s the case, use your device to interrupt it free and clear off any small bits of wooden left on the body.
When the wedge is free, you’ll nonetheless have a bit wax left to take away from the body. However first, use your hive device to scrape the outdated comb from the wedge bar. Typically it comes off in a giant sheet – which it actually cool to see.
2. Now is an effective time to wash any wax and propolis off all elements of the wood body. It will make alternative a lot simpler.
What to do with the outdated wax? Chances are you’ll be tempted to attempt harvesting usable wax from this outdated comb. This may very well be completed by utilizing a photo voltaic melter or melting the comb in a pot with added water to clear the beeswax.
Be suggested that it’s going to REALLY odor dangerous through the processing part. Personally, I don’t suppose outdated comb is well worth the effort.
It’s a very messy job and generally the wax harvested is darkish and unattractive. However it’s possible you’ll need to expertise it – not less than as soon as. LOL
3. You will need to pay particular consideration to the underside bar of your body. You probably have a “break up backside bar”, it’s straightforward to wash away any particles together with your hive device.
In case your beehive has a “grooved backside bar” that’s strong with a small groove, cleansing would require a bit extra effort.
Use a hook or screwdriver to wash out the groove nicely. Failure to wash the underside bar could trigger your new beeswax basis to not match correctly.
4. After I set up beeswax basis, I flip my body the wrong way up. Why?
Right this moment most wax sheets of basis are strengthened with embedded wires. Small wire hooks are on the high of the sheet. The wedge bar is used to lock the hooks to the highest bar.
Make certain that the wire hooks are laying firmly towards the highest bar. Then, you’ll be able to connect the wedge bar to the underside of the highest bar with a staple gun or small nails. The wire hooks will probably be “wedged” in between the two items of wooden.

5. Now, we need to gently push the underside of the sheet into the underside bar. This is usually a bit irritating so take your time and don’t quit.
I exploit my hive device to push the little wires into the underside bar slot. If it breaks a bit – no worries – simply so the sheet hangs straight within the body.
You might have a backside bar that’s grooved, break up or two separate items. Grooved backside bars are historically used with plastic basis as a result of it pops in. However you continue to want to wash away any outdated wax.
Knowledgeable Ideas
The objective is to put in the beeswax basis in order that it hangs straight. The highest is secured utilizing the hooks and wedge bar.
The underside of the inspiration is held in place by the break up backside bar – or it matches down right into a groove.
Because of the variations in manufacturing, you’ll sometimes get sheets of wax basis that’s only a bit too lengthy to suit nicely inside your body.
No drawback, use a field cutter or scissors to nip off simply sufficient of the wax and wire for the inspiration to suit correctly.
Vertical “cross wiring” was as soon as fashionable however it isn’t used as a lot right this moment. Because the bees “draw comb” and construct up wax on the sheet, it can change into extra sturdily connected to the wooden body.
If the sheets of basis don’t cling straight, you will have crooked comb within the hive. If after a number of makes an attempt you might be nonetheless having hassle with the sheet desirous to curve.
Use bobby pins, small nails, or commercially out there assist pins within the aspect bars. Putting in beeswax basis is time consuming. Nonetheless, it isn’t an exercise that needs to be repeated yearly.
Last Ideas
Take your time, benefit from the course of, you might be working to your bees to offer them the absolute best probability of survival. Having new wax basis within the hive promotes higher hive well being and makes the job of caring for them simpler for you too.
Steps to Set up New Beeswax Basis
Directions for changing outdated comb by putting in new beeswax basis in hive frames.
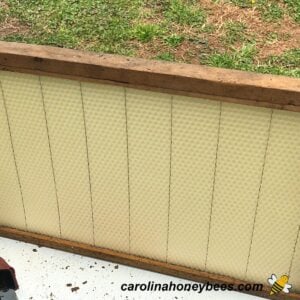
- 1 piece beeswax basis (sized for body)
- 1 piece wood bee body
- Take away WedgeThese directions are for wedge high frames. The fundamental process is similar regardless however regulate if wanted.Assuming you might be changing basis in an outdated body. Take away the wedge to loosen the present comb. Your hive device or a screwdriver will work.By taking your time and loosening the bar a bit at a time all the best way throughout, you’ll be able to take away it from the body with out breaking it!
- Scraping Picket ComponentsUse your hive device to scrape away any bits of wax or propolis in your body – together with the wedge. We need to re-use it if attainable. Cleansing the body makes reassembly a lot simpler.Pay particular consideration to the underside bar. Whether or not you could have a break up backside bar or a grooved slot – clear the wax out of both.
- Putting in a New Sheet of BasisOne of many best strategies is to flip the body the wrong way up and let gravity support you within the course of. Add a sheet of beeswax basis, (the wrong way up as nicely) in order that the bent hooks are cradled towards the underside of the highest bar.
- Now, it’s time to add your wedge again to the body. The hooks ought to be between the wedge and the highest bar. Maintain it firmly in place and connect with small nails – or the simplest approach is with a powerful stapler. I often put 3 nails/staples – one on both finish and one within the center. We wish it to be safe – however I’ll need to take away it once more sometime too.
With the inspiration firmly connected to the highest of the body, it’s time to match it into the underside bar. This takes a little bit of endurance. Use your hive device to softly work the wires down within the backside bar break up or groove. The muse should cling straight.
* Be certain that the inspiration hangs straight if you find yourself completed.
[ad_2]